# Unityへの導入

## 事前準備

Unity2021でURPのプロジェクトを作成します。

<figure><img src="/files/mVsFgP10r2w7B3XGa1T6" alt=""><figcaption></figcaption></figure>

## インストール

こちらからstable-diffusion-for-unityのunitypackageをダウンロードしてください

{% embed url="<https://github.com/witchpot-studio/stable-diffusion-for-unity/releases/tag/v1.4.0>" %}

ダウンロードしたunitypackageを上記で作成したUnityProjectにインポートします

<figure><img src="/files/D7xC4PCNqXJVyygPbgUM" alt=""><figcaption></figcaption></figure>

インポートするとPreferencesのStableDiffusion For Unity画面が表示されます。もし表示されない場合はメニューのEdit > Preferences >  StableDiffusion For Unityから開けます。（Internalのものを使う場合はこの設定は必要ありません）

<table><thead><tr><th width="116">タイプ</th><th width="627.3333333333333">内容</th></tr></thead><tbody><tr><td>Internal</td><td>デフォルト。StableDiffusionのこだわりがない場合こちら<br><br>初回StartServerで自動的にWitchpotカスタムのStableDiffusionがCドライブユーザーフォルダ内にインストールされます。</td></tr><tr><td>External</td><td>自分でインストール・カスタマイズしたStableDiffusionを使用したい場合<br>（またはCドライブ以外にインストールしたい場合）<br>WebUIのwebui-user.batをAPIモード設定しパスを指定してください。<br><br>インストールの詳細は <a data-mention href="/pages/VRwCc6Kqxt8t3OD0fvJw">/pages/VRwCc6Kqxt8t3OD0fvJw</a>をご覧ください</td></tr></tbody></table>

<figure><img src="/files/23oMAAHBjunhEZoRWLJI" alt=""><figcaption></figcaption></figure>

Witchpot > StartServerボタンを押してください

<figure><img src="/files/5HWlIOC0yCI9kFe0h2ls" alt=""><figcaption></figcaption></figure>

※もしStartServerを押しても何も始まらない場合（特にstable-diffusion-for-unityを更新した場合）一度UnityEditorの再起動を行ってください

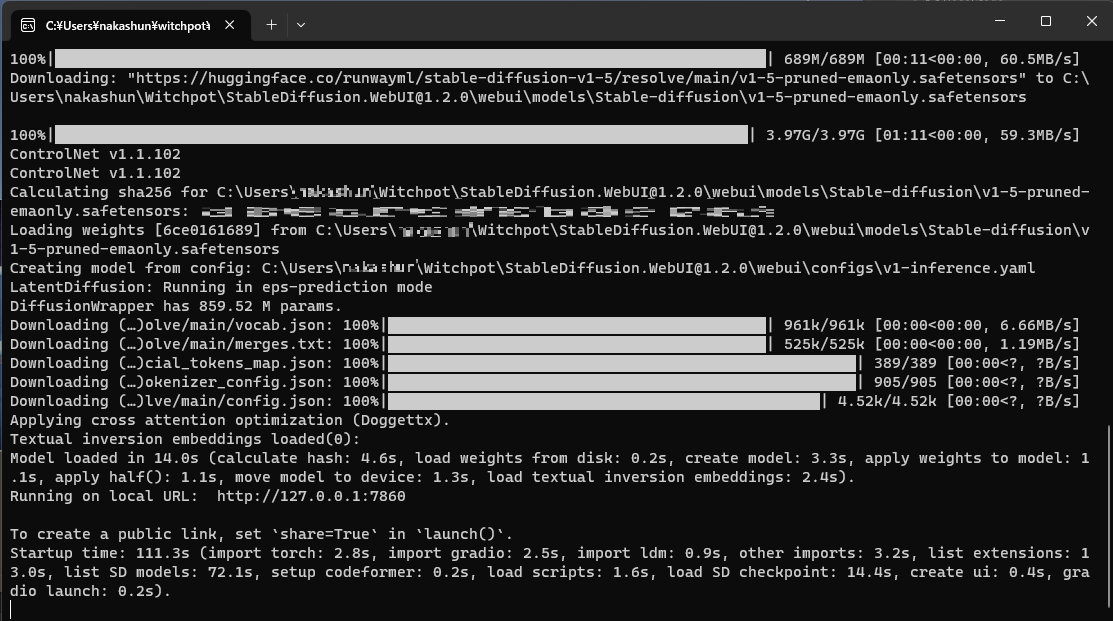
サーバーを起動するとCommandPromptが開かれます。

最初の起動時には必用なファイルのダウンロードを行っているため時間がかかります。

<figure><img src="/files/UAAgLlKPdGdyhPJP4mX6" alt=""><figcaption></figcaption></figure>

CommandPromptに\
Running on local URL:   htt@://127.0.0.1:7860\
のように表示されてとまったらインストールが完了し生成が出来る状態です。

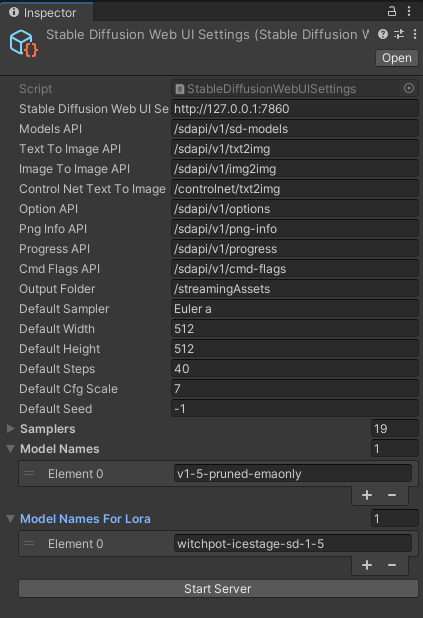
Assets\Plugins\Witchpot\Packages\StableDiffusion\Runtime\Settings\StableDiffusionWebUISettings

を開き、ModelNames, ModelNamesForLoraに要素が1つ以上入っていることを確認してください。

<div align="left"><figure><img src="/files/M7Sp0taMSscJRWYMWUJD" alt=""><figcaption></figcaption></figure></div>

入っていない場合はStartServerして同じボタンの箇所に出るListModelsを押してください

## 動作確認

下記パスの2DStageDemoシーンを開いてください

Assets\Plugins\Witchpot\Packages\StableDiffusion\Example\Demo\Scenes\2DStageDemo

<figure><img src="/files/E7aD9gLObqlrMI60DP2Z" alt=""><figcaption></figcaption></figure>

Canvas > RawImage-Depth2Img を選択してDepth2Imgコンポーネントの設定を行いGenerateを押してください。

<figure><img src="/files/FBgZCcKcL9ZDrWkjW5mJ" alt=""><figcaption></figcaption></figure>

Generateボタンを押すとサーバーのCommandPromptにプログレスバーが表示されます<br>

<figure><img src="/files/AIfTCfDM7GM7TKuNRAKz" alt=""><figcaption></figcaption></figure>

生成が完了するとRawImageにTextureが割り当てられます。

<figure><img src="/files/dLKStXkT4fa5QrMYilDe" alt=""><figcaption></figcaption></figure>

もしエラーが出て進めない場合はVRAM不足などが考えられます。解像度を下げたり、Text2Imgを試すなどを行ってください。


---

# Agent Instructions: Querying This Documentation

If you need additional information that is not directly available in this page, you can query the documentation dynamically by asking a question.

Perform an HTTP GET request on the current page URL with the `ask` query parameter:

```
GET https://docs.witchpot.com/settoappu/unityheno.md?ask=<question>
```

The question should be specific, self-contained, and written in natural language.
The response will contain a direct answer to the question and relevant excerpts and sources from the documentation.

Use this mechanism when the answer is not explicitly present in the current page, you need clarification or additional context, or you want to retrieve related documentation sections.